Tube Lens Comparison Test
- Daniel Knop
- 6. Feb.
- 27 Min. Lesezeit
Raynox DCR 150
Schneider Kreuznach Componon 210
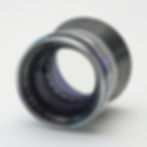
Novoflex Micro Tube
and a Chinese-made ITL-200 clone

A tube lens is the optical component that makes it possible to use infinity-corrected microscope objectives. Such objectives do not form a direct image; instead, they emit a parallel bundle of light. The tube lens collects this parallel light and projects it onto the camera sensor—forming the image on the sensor.
In simplified terms, the microscope objective determines resolution and numerical aperture, while the tube lens defines how this information is transferred to the sensor. Its focal length sets the nominal magnification, and its optical quality has a decisive influence on contrast, field uniformity, and image stability all the way out to the edges—especially when large sensors and high-NA objectives are used. For this reason, the tube lens is a critical component for overall image quality, and this comparative test is intended to help develop a better general understanding of tube lenses and their practical behavior.
How good a tube lens really is in practice does not become apparent from the data sheet alone, but from its interaction with a specific microscope objective, a camera, and a real-world imaging setup. This interaction is the focus of the following investigation.
Four different tube lenses were tested, all used with the same microscope objective: an HLB Plan Apo 20×. For one tube lens, an additional test was later carried out with an HLB Plan Apo 50×, because the initial comparison had produced very close results. In all cases, a Canon R3 was used as the camera. The goal was not to compare the lenses under idealized laboratory conditions, but to determine at which tube length each lens delivers its best photographic performance in practice—and then to compare these optimized results directly.
One important point should be emphasized from the outset: although tube lenses are specified for a particular focal length, the optimal distance between tube lens and camera sensor—the so-called sweet spot—often does not lie exactly at this nominal value. The physical reasons for this are explained later in the text.
For this reason, each tube lens was first tested at several different extension lengths. Only after the sweet spot had been determined for each lens—that is, the tube length at which sharpness, contrast, color correction, and field uniformity were best balanced in combination with the respective objective (and its numerical aperture)—was the actual comparison between lenses carried out.
The experimental setup was identical for all images. Photography was performed on a horizontal focus-stacking rig, with focus shifts applied exclusively via the camera’s linear stage. A Novoflex Castel Micro was used for this purpose. Each final image consists of a focus stack of 100 individual frames, processed with Helicon Focus.

A planar semiconductor wafer was used as the test subject. Its extremely fine, high-contrast structures and excellent flatness make it particularly well suited for revealing differences in resolution, contrast, chromatic correction, and image-field uniformity—especially toward the edges and corners of the sensor.
Lighting conditions were kept constant throughout all test series. Two Godox SL60W studio LEDs illuminated the subject through a large, bell-shaped diffuser. This ensured that observed differences in image quality could be attributed to the optical characteristics of the tube lenses themselves, rather than to variations in illumination.

Based on this setup, the four tube lenses are compared below. Each evaluation separately considers the image center, the extended center, the edge regions, and the image corners—always at the tube length where the respective lens showed its best performance.
Why the Sweet Spot Often Lies Below the Nominal Tube Length
Before turning to the comparisons, a brief theoretical discussion is useful, as it highlights an insight that can be extremely helpful when working with high numerical apertures.
Anyone using infinity-corrected microscope objectives quickly encounters what seems to be a clear rule: if an objective is designed for a 200-mm tube lens, then the distance between tube lens and camera sensor must also be 200 millimeters. Anything else initially appears to be a deviation from the ideal, or even a setup error. This assumption is widespread and understandable—but it falls short.
In reality, the specified focal length of a tube lens describes only a geometric relationship. It defines the distance at which the nominal magnification of the objective—the value printed on the barrel—is achieved. It does not indicate the tube length at which optical performance is optimally balanced. This is the core of the misunderstanding: nominal magnification and maximum image quality do not necessarily occur at the same tube length.
In an idealized model, a perfectly parallel beam exits the infinity-corrected microscope objective and is projected onto the sensor by an ideal tube lens without any aberrations. In real photography, however, such ideal components do not exist. Every tube lens represents a compromise among different optical corrections, and even very high-quality designs exhibit unavoidable residual aberrations. These residual errors increase the more strongly the lens is used toward its outer zones.
Particularly critical are light rays that travel at a steep angle relative to the optical axis while simultaneously passing through outer regions of the tube lens. These rays contribute significantly to fine detail resolution, but they place the greatest demands on optical correction and therefore react most sensitively to even minor residual errors in the system.

How noticeable this effect becomes depends primarily on how steep these rays are. This, in turn, is determined mainly by the numerical aperture of the microscope objective. Objectives with low numerical aperture produce relatively shallow ray cones that are easy for a tube lens to handle. High-resolution objectives with large numerical apertures, by contrast, deliver very steep marginal rays—and these place the highest demands on the tube lens. The magnification itself plays only an indirect role: higher magnifications often, but not necessarily, go hand in hand with higher numerical apertures. What matters is not the number printed on the objective, but how steeply the light travels through the system.
When the nominal tube length is fully used—meaning the distance between sensor and tube lens equals the tube lens focal length—the system operates in a borderline regime. The tube lens is used to its full image circle, and the steep marginal rays are fully involved in image formation. At this point, unavoidable residual aberrations become most visible. It should be kept in mind that every lens performs best in its center, with aberrations increasing toward the edges.
These effects do not appear as dramatic distortions, but rather as subtle changes: a slight loss of microcontrast, less visual calm toward the edges, or occasional minor color shifts. The microscope objective itself is functioning perfectly correctly—it is the tube lens that is now being pushed to its practical limits, particularly in its outer zones. As noted earlier, this occurs mainly at high numerical apertures. With low-NA objectives—such as a Mitutoyo M Plan Apo 5x with NA 0.14—this effect is barely noticeable.
If the distance between tube lens and sensor is reduced slightly, the situation changes fundamentally. The magnification decreases only moderately, while the tube lens operates in a much less critical optical region. The steepest and most error-prone marginal rays contribute less to image formation because the effectively used image circle becomes smaller. As a result, visible aberrations decrease disproportionately. The image often appears calmer, with higher microcontrast, better field uniformity, and more stable corners.
This region, where magnification, ray geometry, and the unavoidable limits of real optics are most favorably balanced, is known as the sweet spot. It is not a coincidence, nor a sign of a poorly designed tube lens, but a systematic property of real optical systems.
The effect is most pronounced with high-resolution microscope objectives featuring large numerical apertures, as these place far greater demands on the tube lens than low-aperture systems. With NA values below roughly 0.25, the sweet-spot effect is usually negligible. In the range between about 0.30 and 0.45, it almost always becomes clearly visible, and at very high numerical apertures of 0.50 and above, the nominal tube length is rarely the setting that delivers the best image quality. What is barely noticeable at low magnifications becomes unmistakable at higher ones. For this reason, this test did not focus on 5x or 10x objectives, but instead used a 20x objective with NA 0.42, and in one case also a 50x objective with NA 0.55, to make the effect more apparent.
For practical focus-stacking work with microscope objectives, this means that the mathematically “correct” tube length is not automatically the best setting. It is merely the condition required to reach the nominal magnification printed on the objective. In industrial applications—for example when using metallurgical objectives—this exact magnification may indeed be critical, sometimes more important than achieving the last bit of image quality. If, however, the goal is the best possible photographic image quality, the extension should be deliberately reduced slightly at higher numerical apertures. The resulting small loss in image scale can easily be compensated later by upscaling. Especially in focus stacking with full-frame sensors, this difference is often decisive. In this context, the sweet spot does not represent a loss of performance, but rather the point at which the entire optical system performs most convincingly.

This also explains an experience shared by many practitioners: working with a 5x objective is comparatively straightforward, with a 10x objective already more demanding, at 20x clearly challenging, and at 50x or even 100x a task for very experienced users. As numerical aperture increases, the objective delivers increasingly steep ray cones. As a result, optical tolerances become tighter, and both the objective and the tube lens must work together with much greater precision. Any increased use of marginal ray paths makes the entire system more sensitive to even very small deviations and residual aberrations.
Several years ago, the late U.S. optics expert Robert O’Toole (www.closeuphotography.com) already pointed out this relationship. He recommended using the Raynox DCR-150 tube lens in combination with Mitutoyo M Plan Apo objectives not at the nominal extension of 200 or 208 millimeters, but instead reducing the extension to around 145 millimeters. In this configuration, he observed a visibly higher image quality. This empirically based recommendation remains fully valid today—its benefit, however, depends critically on the numerical aperture of the objective used, as explained above.

Why Is This Different on a Microscope?
At this point, a natural question arises: why would no one working with a classical microscope ever consider shortening the tube to improve image quality? The answer is surprisingly simple. On a microscope, we do not observe a large rectangular sensor area, but rather produce a comparatively small, circular image. Essentially only the center of the image circle is used. Aberration-prone outer zones play virtually no role because they are not visible at all.
For this reason, many classical laboratory microscope objectives could be optimized consistently for performance in the image center without regard for off-axis aberrations. Central-sharpness-optimized plan apochromats are a good example. These aberrations do exist, but they lie outside the utilized image field and therefore remain invisible. This is also why many such objectives are only of limited use—or not usable at all—on full-frame sensors: they were never designed to reproduce such a large image circle with uniform quality.

With focus stacking using camera sensors, the situation is fundamentally different. Here we generate a rectangular image whose edges extend far beyond what is used in classical microscope operation. A good example is provided by Mitutoyo M Plan objectives, for which an image circle diameter of approximately 26 to 30 millimeters is specified, depending on the source. A full-frame sensor, however, uses a diagonal of about 43 millimeters. This inevitably forces us to use lens zones that were never visible in the original application. Aberrations from both the objective and the tube lens are no longer masked—they are revealed mercilessly.
This is exactly where the sweet spot becomes so important. By slightly reducing the tube extension, we reduce the load on these critical marginal zones without losing a meaningful amount of effective image information. What happens automatically on a microscope due to the limited image size must be deliberately controlled in focus stacking with large sensors and high numerical apertures by choosing the appropriate extension length. The sweet spot is therefore not a theoretical construct, but a practical answer to the question of how to sensibly combine high-resolution microscope objectives with modern camera sensors.
Unfortunately, there is no simple rule that works in every case. Start your recordings with the nominal extension—that is, the distance between tube lens and sensor corresponding to the tube lens focal length. This is a good baseline. If you are working with high-NA objectives, however, it is almost always worthwhile to experiment further: record one or two additional image series with a slightly reduced extension and compare the results carefully on screen.
Often the image seems to “breathe” again: fine structures appear clearer, contrast becomes more stable, and edge regions calmer. Especially when a high-aperture objective initially behaves awkwardly or proves difficult to control in stacking, a moderately reduced extension can surprisingly often be the decisive step in the right direction.
Keep in mind, however, that such sweet-spot values are not universal recipes. The optimal extension lengths determined below apply only to the specific combinations of objective and tube lens tested here. Any other combination represents a new small experiment—and that, in fact, is part of the appeal of this kind of photography.
The following evaluation is based in each case on the fully analyzed image. The assessment takes into account the image center, edge regions, and corners. For reasons of layout, however, only central image crops are shown here, so that subtle differences in sharpness, microcontrast, and structural stability remain clearly visible despite the four-image arrangement. The displayed crops are therefore illustrative and not decisive for the evaluation.
Determining the Optimal Extension at NA 0.42
Raynox DCR-150 (nominal 208 mm), Tested extensions: 140 / 160 / 180 / 208 mm
140 mm: visibly underutilized, low microcontrast
160–180 mm: clearly the most balanced rendering, calm image field
208 mm: higher magnification, but clear degradation in edges and corners
→ Sweet spot: 160–180 mm

Across all tested extensions, the central image region shows a clear and internally consistent progression. At the nominal extension of 208 mm, the Raynox appears visibly overdriven even in the center: while nominal resolution remains high, fine structures look slightly brittle, microcontrast is reduced, and the image has a faintly “strained” character. This is not a question of sharpness in the strict sense, but of tonal stability and local contrast—edges appear a bit nervous, and homogeneous areas show less internal coherence.
Reducing the extension to 180 mm leads to an immediate and clearly visible improvement in the central field. Microcontrast increases, edges appear calmer and more stable, and the overall rendering gains coherence. The image looks less forced, even though the fundamental character of the Raynox—slightly softer and less contrast-rich than high-end tube lenses—remains unchanged. This step already represents a meaningful relief for the lens.
At around 160 mm extension, the Raynox keeps its balance in the central image area. Here, sharpness, microcontrast, and structural stability are still convincing. Fine features are rendered with greatest consistency, tonal transitions are smoot, and the image as a whole appears optically “relaxed.”
When the extension is reduced further to 140 mm, this balance begins to tip in the opposite direction. The image does not become worse in a dramatic sense, but it loses a degree of crispness and vitality. The reduction in magnification now outweighs the marginal gain in optical comfort, and the central image appears slightly flatter and less engaging. In this regime, the lens is effectively underutilized.
Taken as a whole, the Raynox DCR-150 shows a pronounced and strongly NA-dependent response to extension length, even when evaluation is restricted strictly to the central image region. It benefits more from extension reduction than any of the other tested solutions, but even at its sweet spot it delivers a solid rather than outstanding central performance.
Chinese ITL-200 clone, Tested extensions: 120 / 140 / 160 / 180 / 200 mm
120–140 mm: stable, but limited resolution
160 mm: best balance of sharpness and field calmness
≥180 mm: rapid loss of quality, unstable edges
→ Sweet spot: approx. 160 mm

Across all tested extension lengths, a consistent and clearly interpretable pattern emerges. At the nominal extension of 200 mm, the lens already appears visibly overstressed even in the central image region. While nominal resolution remains high, microcontrast and structural stability decline noticeably. Fine details lose precision, the image takes on a strained appearance, and the limits of the optical correction become clearly visible despite extensive focus stacking.
A moderate reduction of the extension to 180 mm leads to a perceptible relief of the optical system. Contrast and structural stability improve, and the image appears calmer and more homogeneous overall, although the fundamental limitations of the lens are not yet fully overcome. Only at a further reduced extension of around 160 mm does the lens reach its best balance within the central ray bundle: center sharpness, microcontrast, and image calmness are most evenly matched here, and the rendering appears controlled and reproducible. When the extension is reduced even further (140 mm), this balance shifts again—the optics become clearly underutilized, the magnification drops more than the modest gain in image quality would justify, and the image loses visual vitality.
Taken as a whole, the Chinese ITL-200 copy exhibits strongly NA-dependent behavior with very limited correction reserves, which become apparent even in the central image region. It benefits more than any of the other tested solutions from a pronounced reduction of the extension, yet even at its sweet spot it achieves only a solid, but not outstanding, level of image quality. Crucially, the observed deficiencies are not artifacts of focus stacking. Despite 100 stacked frames, losses in contrast, reduced structural stability, and a certain optical unrest remain visible—clear indications of real, system-level limitations that cannot be compensated computationally.
The lens is therefore functional and usable for simple, centrally weighted applications. At the same time, it very clearly demonstrates the limitations of a tube lens that is not fully corrected once high numerical apertures are involved—even when the evaluation is restricted strictly to the central image area.
Novoflex (nominal 200 mm), Tested extensions: 180 / 200 mm
(The rigid tube of the Micro Tube does not allow extension variation; however, the lens was used only with the front tube section, which was mounted on a Novoflex BALPRO 1 bellows unit providing 20 mm of travel.)
180 mm: Nearly identical center sharpness compared to 200 mm; slightly more homogeneous overall field, but only a very small gain from the reduced extension
200 mm: Maximum magnification; edge and corner performance appears slightly more strained
→ Sweet spot: approx. 180 mm

With the Novoflex tube lens, the influence of a reduced extension length is clearly NA-dependent. When combined with the HLB Plan Apo 20x (NA 0.42), the differences between images taken at 200 mm and 180 mm extension are minimal; no clear qualitative advantage of the shortened extension is apparent in the central image region. When using the HLB Plan Apo 50x (NA 0.55), however, the effect becomes more pronounced: at 180 mm extension the image appears slightly calmer and richer in contrast, whereas the nominal 200 mm extension places the tube lens visibly closer to its optical limits. This confirms that, even in the case of the Novoflex, the sweet-spot effect is driven less by the tube lens itself than by the NA level of the objective being used.
Schneider Kreuznach Componon 210, Tested extensions: 140 / 160 / 180 / 210 mm
140 mm: clean, but visibly underutilized
160 mm: very strong overall performance
180 mm: best balance of sharpness, contrast, and field homogeneity
210 mm: no improvement, slight degradation
→ Sweet spot: approx. 180 mm

The Schneider Kreuznach Componon 210 shows remarkably consistent and, at the same time, highly informative behavior across the tested extension lengths.
At the nominal extension of 210 mm, the lens already operates at a very high level in the image center. Formal resolution is excellent, fine structures are cleanly separated, and the image appears calm and stable overall. In direct comparison with shorter extensions, however, a slight restraint in microcontrast becomes apparent. The rendering is correct and clean, but marginally less “gripping” than the lens’s optical potential would suggest. This is not a case of optical overload, but rather of a balance that is not yet fully optimized.
Reducing the extension to 180 mm results in a clearly perceptible improvement in precisely these aspects. Microcontrast increases visibly, edges appear more crisply defined, and fine textures within the metal surfaces look more structured and stable. The image gains presence without losing its inherent calmness. At this extension length, the impression emerges for the first time that lens, objective, and sensor are working together in a particularly favorable equilibrium.
At 160 mm, image quality remains very high but changes character slightly. The rendering is still extremely clean and quiet, yet appears just a touch less contrast-rich than at 180 mm. The differences are subtle and firmly within a very high quality range, but they indicate that the lens is already becoming slightly underutilized. The gain in optical relaxation is now increasingly offset by the reduction in magnification.
When the extension is reduced further to 140 mm, this effect becomes more pronounced. The image remains correct and sharp, but loses some of its internal tension. Fine structures appear a bit flatter, microcontrast decreases slightly, and the overall image looks less “lively.” Unlike the behavior observed with the Raynox, this is not an indication of optical weakness; on the contrary, it reflects that the Schneider lens is being operated well below its optimal working range.
Overall, the Schneider Kreuznach Componon 210 exhibits exceptionally stable and forgiving behavior, even at extension lengths close to its nominal focal length. In contrast to the Chinese ITL copy or the Raynox, no signs of overload are evident; instead, only a subtle shift in the optimal balance can be observed. The sweet spot lies clearly around 180 mm, where microcontrast, structural stability, and image calmness in the center combine most convincingly.
Crucially, the differences between extension lengths are noticeably finer and more subtle with the Schneider lens than with simpler solutions. That they remain clearly visible nonetheless—despite identical, centrally cropped image sections and despite deep focus stacking—speaks to the high optical quality of the lens. It responds sensitively to changes in the light path without ever becoming unstable or strained. It is precisely this sense of composure that fundamentally distinguishes it from the simpler tube lenses in the test.
Comparison of the Four Tube Lenses
Only after these individually determined sweet-spot settings had been established was the direct, side-by-side comparison of the four tube lenses carried out in the next section—of course using the same objective.
This creates the conditions for a fair comparison. Each of the four tube lenses was evaluated at the extension length where it had shown its best imaging performance in the preceding test. All judgments below refer exclusively to these sweet-spot configurations.
The comparison that follows is therefore no longer about the question of at what distance a tube lens performs best, but about its real-world image quality under optimized conditions. Center, extended center, edge region, and corners are compared—based on identical exposure parameters and the same optical setup.
We begin with the Raynox DCR-150, a compact lens originally designed as a close-up attachment and commonly used in macro photography as a budget tube-lens substitute. Next come a Chinese ITL200 clone, the Novoflex tube lens from the Micro Tube system, and finally the vintage Schneider Kreuznach Componon 210 enlarging lens used in reverse orientation.
HLB Plan Apo 20x; optimal extension for each lens; identical test setup
Tested configurations:
Raynox DCR-150 (nominal ≈208 mm) → optimum at 160–180 mm (used here: 180 mm)
Chinese ITL-200 clone → optimum at 160 mm
Novoflex 200 mm → optimum at 180 mm
Schneider Kreuznach Componon 210 → optimum around 180–210 mm (sweet spot: 180 mm)
1. Center

Raynox DCR-150
Very high nominal resolution
Fine structures cleanly separated
Slightly reduced microcontrast
A subtly “softer” rendering than Novoflex/Schneider
Rating: very good
Chinese ITL clone
High resolution in the center
Contrast visibly lower
Fine structures appear slightly “grainy”
No obvious color fringing in the center
Rating: good to very good
Novoflex
Very high microcontrast
Edges clearly defined
Fine structures extremely stable
No visible contrast loss
Rating: excellent
Schneider Componon 210
Likewise very high resolution
Slightly less “snappy” than Novoflex
Very even tonal reproduction
A classically “calm,” smooth rendering
Rating: excellent
Center – ranking
Novoflex
Schneider Componon
Raynox DCR-150
ITL clone
2. Extended center (≈50% image radius)

Raynox DCR-150
Good detail rendering
First signs of contrast drop
Very slight chromatic shift along bright/dark edges
Rating: good
Chinese ITL clone
Clearly stronger contrast loss
Fine structures less stable
First signs of “restlessness” in parallel traces
Rating: satisfactory to good
Novoflex
Hardly any difference from the center
Contrast and detail fidelity remain high
Lines remain cleanly separated
Rating: excellent
Schneider Componon 210
Very even performance
Slightly lower contrast than Novoflex
No visible color errors
Rating: very good to excellent
Extended center – ranking
Novoflex
Schneider Componon
Raynox DCR-150
ITL clone
3. Edge region (≈75–90% image radius)

Raynox DCR-150
Clear drop in microcontrast
Structures still resolved, but less stable
First indications of field curvature
Rating: satisfactory to good
Chinese ITL clone
Clearly visible loss of quality
Low contrast
Lines begin to “smear”
Rating: adequate to satisfactory
Novoflex
Very good detail fidelity
Contrast remains surprisingly high
Only minimal decline compared to the center
Rating: very good
Schneider Componon 210
Even rendering
Slightly lower contrast than Novoflex
Very clean lines without color errors
Rating: very good
Edge region – ranking
Novoflex
Schneider Componon
Raynox DCR-150
ITL clone
4. Corners (outermost image area)

Raynox DCR-150
Noticeable drop in sharpness and contrast
Structures still recognizable, but soft
Clear field curvature; even with a deep focus stack, the corners remain visibly softer and lower in contrast than the center
Rating: adequate
Chinese ITL clone
Strong loss of sharpness
Low contrast
Partly unstable rendering
Rating: borderline
Novoflex
Corners generally well controlled
In this test not clearly better than the Raynox
Some contrast loss
Rating: good
Schneider Componon 210
Very clean corner rendering
Clearly “snappier” than Novoflex
Very uniform, few artifacts
Rating: good to very good
Corners – ranking
Schneider Componon
Novoflex
Raynox DCR-150
ITL clone
Overall assessment
1st place: Novoflex
Reference tube lens: Best combination of contrast, field uniformity, and stability out into the edge region.
2nd place: Schneider Componon 210
Technically excellent, with a slightly different emphasis. A touch less contrast, but extremely even rendering with the best stability all the way into the extreme corners—and in this respect visibly better than the Novoflex.
3rd place: Raynox DCR-150
Surprisingly capable for its price and size. Very good in the center, but at high NA values the usable image circle on full frame is limited.
Last place: Chinese ITL clone
Functional, but clearly optically inferior—especially at high NA values. Center performance is usable, but quality drops quickly outside the center; not a real alternative to higher-end tube lenses.
The Tube Lenses in Detail
In the final comparison of the four tube lenses, the differences are clear and easy to follow—and they lie less in the image center than in how uniformly image quality is maintained across the frame. All of the tested lenses are, in principle, capable of producing sharp images in combination with the HLB Plan Apo 20x. What matters is how consistently that quality holds up from the center through the edge regions and into the corners.
At this point, one important note bears repeating: the evaluation below does not describe the tube lenses as isolated optical components. It applies only to their performance in the tested combination—specifically, with the objective used here and its numerical aperture. Changing the objective type or NA can shift the weighting of the results.
On closer inspection, it becomes clear that the ranking between Novoflex and the Schneider Componon is less straightforward than a simple “first place” label might suggest. Both solutions operate at a very high optical level, but their strengths show up in different areas.
The Schneider Kreuznach Componon stands out above all for its extraordinary uniformity across the image field. Sharpness and contrast remain remarkably stable into the edge regions and corners, without a pronounced drop. This “calm” image character is not subjective—it is a direct consequence of the Componon’s design as a large-format enlarging lens with a large image circle. In practice, this means that anyone who wants to exploit a full-frame sensor completely and without compromise gets a result that is hard to beat in this specific discipline.
The Novoflex tube lens, by contrast, places its emphasis slightly differently. In the center and extended center it delivers very high microcontrast and very strong detail rendering, giving images a distinct “snap.” In addition, it tolerates small deviations in the setup—extension length, slight tilt, or minor mechanical imperfections—better than the Schneider. This robustness matters in day-to-day focus stacking, where perfectly controlled lab conditions are rare. As part of a well-integrated system, the Novoflex also offers clear mechanical advantages that contribute to very high repeatability.
Which tube lens “comes out on top” therefore cannot be decided independently of the evaluation criteria. If image quality across the entire full-frame field is weighted equally, the superior edge and corner stability clearly favors the Schneider Componon. If, instead, one evaluates the complete package—center sharpness, microcontrast, mechanical integration, and everyday usability—the Novoflex remains the reference, though not by a wide margin but by a narrow, well-supported lead.
This overall judgment also includes the practical “surroundings,” which should not be underestimated. The Novoflex tube lens is delivered as a coherent, well-designed system whose mechanical integration makes repeatable results easier and reduces potential sources of error. The Schneider Componon, on the other hand, comes from traditional darkroom practice and was never intended as a standalone tube lens. Using it in this role requires adapters, reverse mounting, and individual mechanical solutions—which inevitably means more effort and additional opportunities for misalignment.
The comparison therefore shows that this is not simply a matter of “better” or “worse,” but of different priorities. The Novoflex excels as a robust system solution with high practical usability; the Schneider Componon as an optically authoritative lens with outstanding field uniformity. Which one is ultimately the better choice depends less on a single measurement than on the demands of your workflow—and what you value more: maximum system stability or the most uniform performance all the way to the corners.
Novoflex Micro Tube
In this comparison, the Novoflex tube lens sets the benchmark. It combines extremely high center sharpness with strong microcontrast and remarkably even performance across the field. The rendering remains controlled and very usable even in the edge regions and corners. This combination of precision, uniformity, and tolerance of small deviations in extension length makes it the reference in this test group—especially when working with full-frame sensors. The gain from shortening the extension was only marginal, which suggests that this tube lens remains very well corrected even when its image circle is used to the fullest.

One key reason lies in the design: the Novoflex is not an isolated tube lens but a modular tube system. The tube consists of two segments that screw together and can be integrated flexibly into different setups. As a complete unit, it can be adapted directly to a camera; alternatively, the front tube section can be mounted via an adapter ring directly onto a Novoflex bellows unit. This makes the system suitable both for compact, rigid setups and for variable configurations with slightly adjustable extension.
At the front, a ring-style adapter carries the microscope objective. A dedicated, rotatable polarizing filter can be threaded into this adapter and rotated independently of the rest of the setup—an especially practical detail when working with reflective samples. Overall, this is a well thought-out system in which optical design, mechanical precision, and usability are clearly aligned. The consistently high imaging performance across the frame is therefore not only a property of the lens itself, but of the overall system concept.
Schneider Kreuznach Componon 210
The Schneider Kreuznach Componon 210 follows closely behind. It is originally a large-format enlarging lens, designed for very large image circles and therefore featuring an unusually large lens diameter. In the configuration used here, the lens was employed—as is common in such applications—in reverse orientation as a tube lens.
These design characteristics explain the image look: the Componon reaches a very high optical level, but its rendering is weighted a bit differently than the Novoflex. Microcontrast is slightly lower; in return, the image is exceptionally calm and even across large portions of the frame. Aberrations that typically appear only in the outer zones of smaller-diameter lenses play virtually no role here, because even on full frame the sensor uses only a central portion of the Componon’s very large image circle.
This generous design suggests that the Componon could likely deliver largely aberration-free imaging even on larger sensor formats such as medium format. Its strength lies less in maximum “snap” than in stable, consistent rendering—a character that pays off especially when uniformity and image calmness matter more than the last percentage point of contrast. On the other hand, mounting such a heavy lens in reverse orientation is usually a DIY solution, which can introduce its own potential sources of error.
What is a Componon—and why does it work as a tube lens?
A Componon is originally an enlarging lens from darkroom photography. Such lenses were designed to project negatives onto photographic paper as evenly and distortion-free as possible. That requires large image circles, high resolution, and very uniform sharpness across the entire field—properties that also make them attractive for use as tube lenses.

In macro and micro photography, Componon enlarging lenses are therefore often repurposed and used in reverse orientation. In this configuration, they effectively function as projection lenses for infinity-corrected microscope objectives. Other large-format focal lengths can also be considered: 135 mm (to achieve a lower magnification with a shorter extension) and 240 mm (as an alternative to the 210 mm). Today, such large-format Componons can often be found at surprisingly low prices—sometimes even cheaper than a used Raynox lens.
Raynox DCR-150
The Raynox DCR-150 is a positive surprise in this comparison—not least because, strictly speaking, it is not a tube lens at all. It is a high-quality close-up lens designed to push conventional photographic lenses into the near and macro range. Typically, it is mounted in front of a lens to shorten the minimum focusing distance and enable higher magnifications.

That such a close-up lens can nevertheless be repurposed as a tube lens has to do with its optical design: the DCR-150 is comparatively well corrected, compact, and delivers surprisingly high sharpness in the central image area. In the configuration tested here, it therefore achieves very strong center performance—good enough to compete with far more expensive solutions.
Its limitations lie in the usable image circle. Since the DCR-150 was never intended to illuminate a large sensor uniformly, image quality drops toward the edges much more quickly than with purpose-designed tube lenses or large-format optics. In the edge regions—and especially in the corners—microcontrast falls noticeably and fine structures become less stable.
These traits are precisely what still makes the DCR-150 attractive: for smaller sensor formats, strongly center-weighted applications, or as a flexible and inexpensive solution, it offers an excellent balance of performance, size, and price. Combined with its low weight and easy integration into existing setups, it becomes clear why it is so often used in macro and micro photography as a pragmatic alternative to classic tube lenses—with the clear understanding that this is always a deliberate compromise.
Thorlabs ITL-200 Clone
The tested Chinese Thorlabs ITL-200 clone plays a special role in this comparison. The Far Eastern manufacturer originally offered this lens as an “original” Thorlabs ITL-200. After information circulated online that it was not the original, the same lens later appeared without branding under the label “Tube Lens 200 mm,” and later under the name “CMH Tube Lens.” It is occasionally sold through a major online auction platform, usually without detailed technical information about its optical design.

However, this lens is not a ready-to-use system. The optic itself has no mounting threads and therefore requires an additional mechanical housing to be integrated into a photographic setup. The tested lens was purchased directly from the manufacturer in China; the required housing was made by Rainer Ernst (Stonemaster).

Optically, the lens does its job, but it clearly trails the other tested solutions. At the optimal extension, center sharpness is usable—especially with lower NA values—but outside the center performance drops quickly, particularly at higher NA values. Edge regions and corners show significant losses in contrast and stability. For demanding full-frame applications, this lens is therefore not a real alternative to well-designed and mechanically integrated tube-lens systems. Using it involves both optical and mechanical compromises that are clearly noticeable in practice.
Conclusion
Overall, the comparison makes one thing very clear: what matters is not the nominal focal length value of a tube lens or the maximum achievable magnification, but the balance of the entire optical system—and the more so, the higher the objective’s numerical aperture.
Anyone who values repeatable, uniform image quality across the full frame, and who also works with higher-NA objectives, will have a hard time getting around high-quality tube lenses such as the Novoflex or the Schneider Kreuznach Componon.
The Novoflex lens comes as a more complex system, with a two-part tube and the option to place a polarizing filter inside the removable front ring. The trade-off is that you largely lose the ability to vary extension length. On the other hand, the lens appears so well corrected that shortening the extension is rarely necessary—even at higher NA values. The only practical route is to combine it with a Novoflex bellows unit, which provides roughly 20 mm of flexibility (depending on the thickness of the camera-mount adapter). In the setup shown here, the extension can be reduced from 200 mm to 180 mm, which at NA 0.42 or 0.55 produced a measurable but barely visible quality improvement.


Schneider Kreuznach Componon enlarging lenses are not only often relatively inexpensive on the used market from older analog gear, but they are also available for different film formats and in a variety of focal lengths—offering another way to vary magnification. Many also have the advantage of being easy to disassemble for cleaning. The aperture, however, should always be left wide open: in this system it is not located at a meaningful aperture position, and stopping down costs more than it delivers.
If, on the other hand, you work with smaller sensors or are willing to accept minor compromises in edge and corner regions—often irrelevant for many center-weighted subjects—the Raynox DCR-150 is a very convincing trade-off between optical performance, compact size, and comparatively low price. An additional advantage is flexibility: without changing the rest of the setup, the DCR-150 can easily be replaced by the physically identical Raynox DCR-250 with a 125 mm focal length to deliberately reduce magnification. The prerequisite is that the configuration allows the shorter extension of roughly 125 mm—for example when using a bellows unit or a comparable system.
Finally: What the Theory Means in Practice
Every lens shows stronger aberrations in its outer zones than in its center. The lower the NA of an infinity-corrected microscope objective, the fewer steep, marginal ray paths contribute to the image—so aberrations from the outer zones of the optics (objective and tube lens) usually remain insignificant in practice. As NA increases, more of these optically demanding rays contribute to image formation.
If extension length is set equal to the tube lens focal length (often treated as the only “correct” solution), the system uses the tube lens’ image circle to the maximum— including potentially problematic outer zones. If extension is shortened, the tube lens works with a smaller, more central area, which excludes part of those marginal ray contributions.
With low NA values (for example, Mitutoyo 5x, NA 0.14), the nominal extension length can be used without issue; reducing extension usually provides no visible benefit because very little critical marginal ray content contributes to the image anyway.
With higher NA values (for example, Mitutoyo 20x, NA 0.42 or 50x, NA 0.55), significantly more marginal ray paths contribute to the image, which—depending on the quality of the tube lens—can reduce image quality. In these cases, shortening the extension by roughly ten to twenty percent often leads to visibly better images.